Throwing Together A Haunted House
There were a lot of things I wanted to do with this project (including work with Bitsy 3D and incorporate bitsy muse) but instead I didn’t and used this an opportunity to start using Bitsy Savior! Here are some notes!
CHARACTERS
Okay, so requirement Number One was always goblins. I jumped into an Encylopedia Britannica article about goblin folklore, then jumped out with the idea that the goblins needed to bothering kids in the most innocent and charming way possible.
This was one of those classic experiences of building the car as you’re driving it. I knew what I wanted to do: I wanted to make a house at night with rooms that could be explored and have one room light be highlighted at a time. With the 3D concept in my head, I wanted to explore that first-person adventure game style. I wanted the house to feel like a real, scary place. But I didn’t want the contents to actually be that scary. In my first thought, I wanted the player to be a kid who lived in this house and woke up because goblins were banging pots and pans in the kitchen.
After I gave up on my Bitsy 3D concept (at least for now, I might re-explore this later), I created the house in Photoshop and planned out what I wanted the child main character to experience. This limited the number of rooms in use. But. Then Sammy suggested including a ghost. And then I decided it would be cute to play as the ghost. Thus, our ghost protagonist was born.
Okay, then admittedly, at that point. I wasn’t sure what the mechanic would be. But I did want a goblin queen. That detail felt important to me.
I made the goblin sprites first in Bitsy before deciding how many goblins or rooms there would be on the final game.
I ended up doing all the conditional formatting and cleaning up some coding before finishing the writing at the very last moment.
Note on having a ghost as a main character: it’s cool that they don’t need to NOT go through walls.
Dialogue Color Thoughts
In my last game, I experimented with silent protagonist + key nouns being highlighted. In this game, I decided to try highlighting the text color of the protagonist’s narrative text. In other Bitsy games I’ve seen, I’ve really appreciated the clarity that provides, but I think it varies based on the narrative the creator is trying to portray.
Dialogue Variable Thoughts
I talked about this a lot more in the little postmortem I wrote for Sunday Afternoon in the Garden, but I think something that I’ve landed on as far as character interactions is giving characters unique variables that represent them and using that same naming scheme to organize other assets related to that same character. (I’m a big fan of using the name section more like a tag list for easy searching of assets)
Anyway, the thought I’m just recording here is that I like organizing my files using that and I want to continue that naming scheme in future Bitsy projects.
Example: The Goblin Queen of 323 has a variable attached to her, meetqueen, and it obviously switches to true when you’ve met the Goblin Queen of 323. There’s different dialogue for every goblin in the house depending on whether or not you’ve spoken to her. And then every goblin in the house has a different variable attached to them that indicates that you’ve spoken to the queen and convinced them to leave AND add to a total that makes sure you’ve talked to every goblin. Making everything dynamic and alive in subtle ways without making my life harder.
For reference for my future self that looks like this (the indents are important)
{
  - tvgob == true ?
    // DIALOGUE THAT COMES AFTER TALKING TO THE QUEEN AND THEN TALKING TO THE TVGOB UNTIL END OF GAME
  - else ?
    {
      - meetqueen == true ?
        // DIALOGUE THAT COMES AFTER TALKING TO THE QUEEN
        {convinced = convinced + 1}
        {tvgob = true}
      - else ?
        {sequence
          - // DIALOGUE THAT COMES WHEN YOU FIRST TALK TO THE TVGOB BEFORE TALKING TO THE QUEEN
          - // DIALOGUE THAT COMES ALL TIMES AFTER YOU HAVE TALKED TO THE TVGOB BUT HAVEN'T TALKED TO THE QUEEN YET
        }
    }
}
You can also do else if arguments, which I wasn’t fully aware of until I did it on accident. Here’s what that looked like for the Goblin Queen of 323’s dialogue:
{
  - convinced == 4 ?
    // ALL CONDITION MET
    {exit "b" 14 10 "wave"}
  - meetqueen == true ?
    // YOU'VE TALKED TO HER BEFORE AND CONDITIONS ARE NOT MET
  - else ?
    // YOU'VE NEVER TALKED TO HER BEFORE
    {meetqueen = true}
}
COLORS
Right before starting this project, I learned how to manually change tile colors in a Bitsy’s game data and how to put in extra colors without hacks.
First you add your colors in their RGB code forms. (Added a note about the hidden naming scheme for colors)

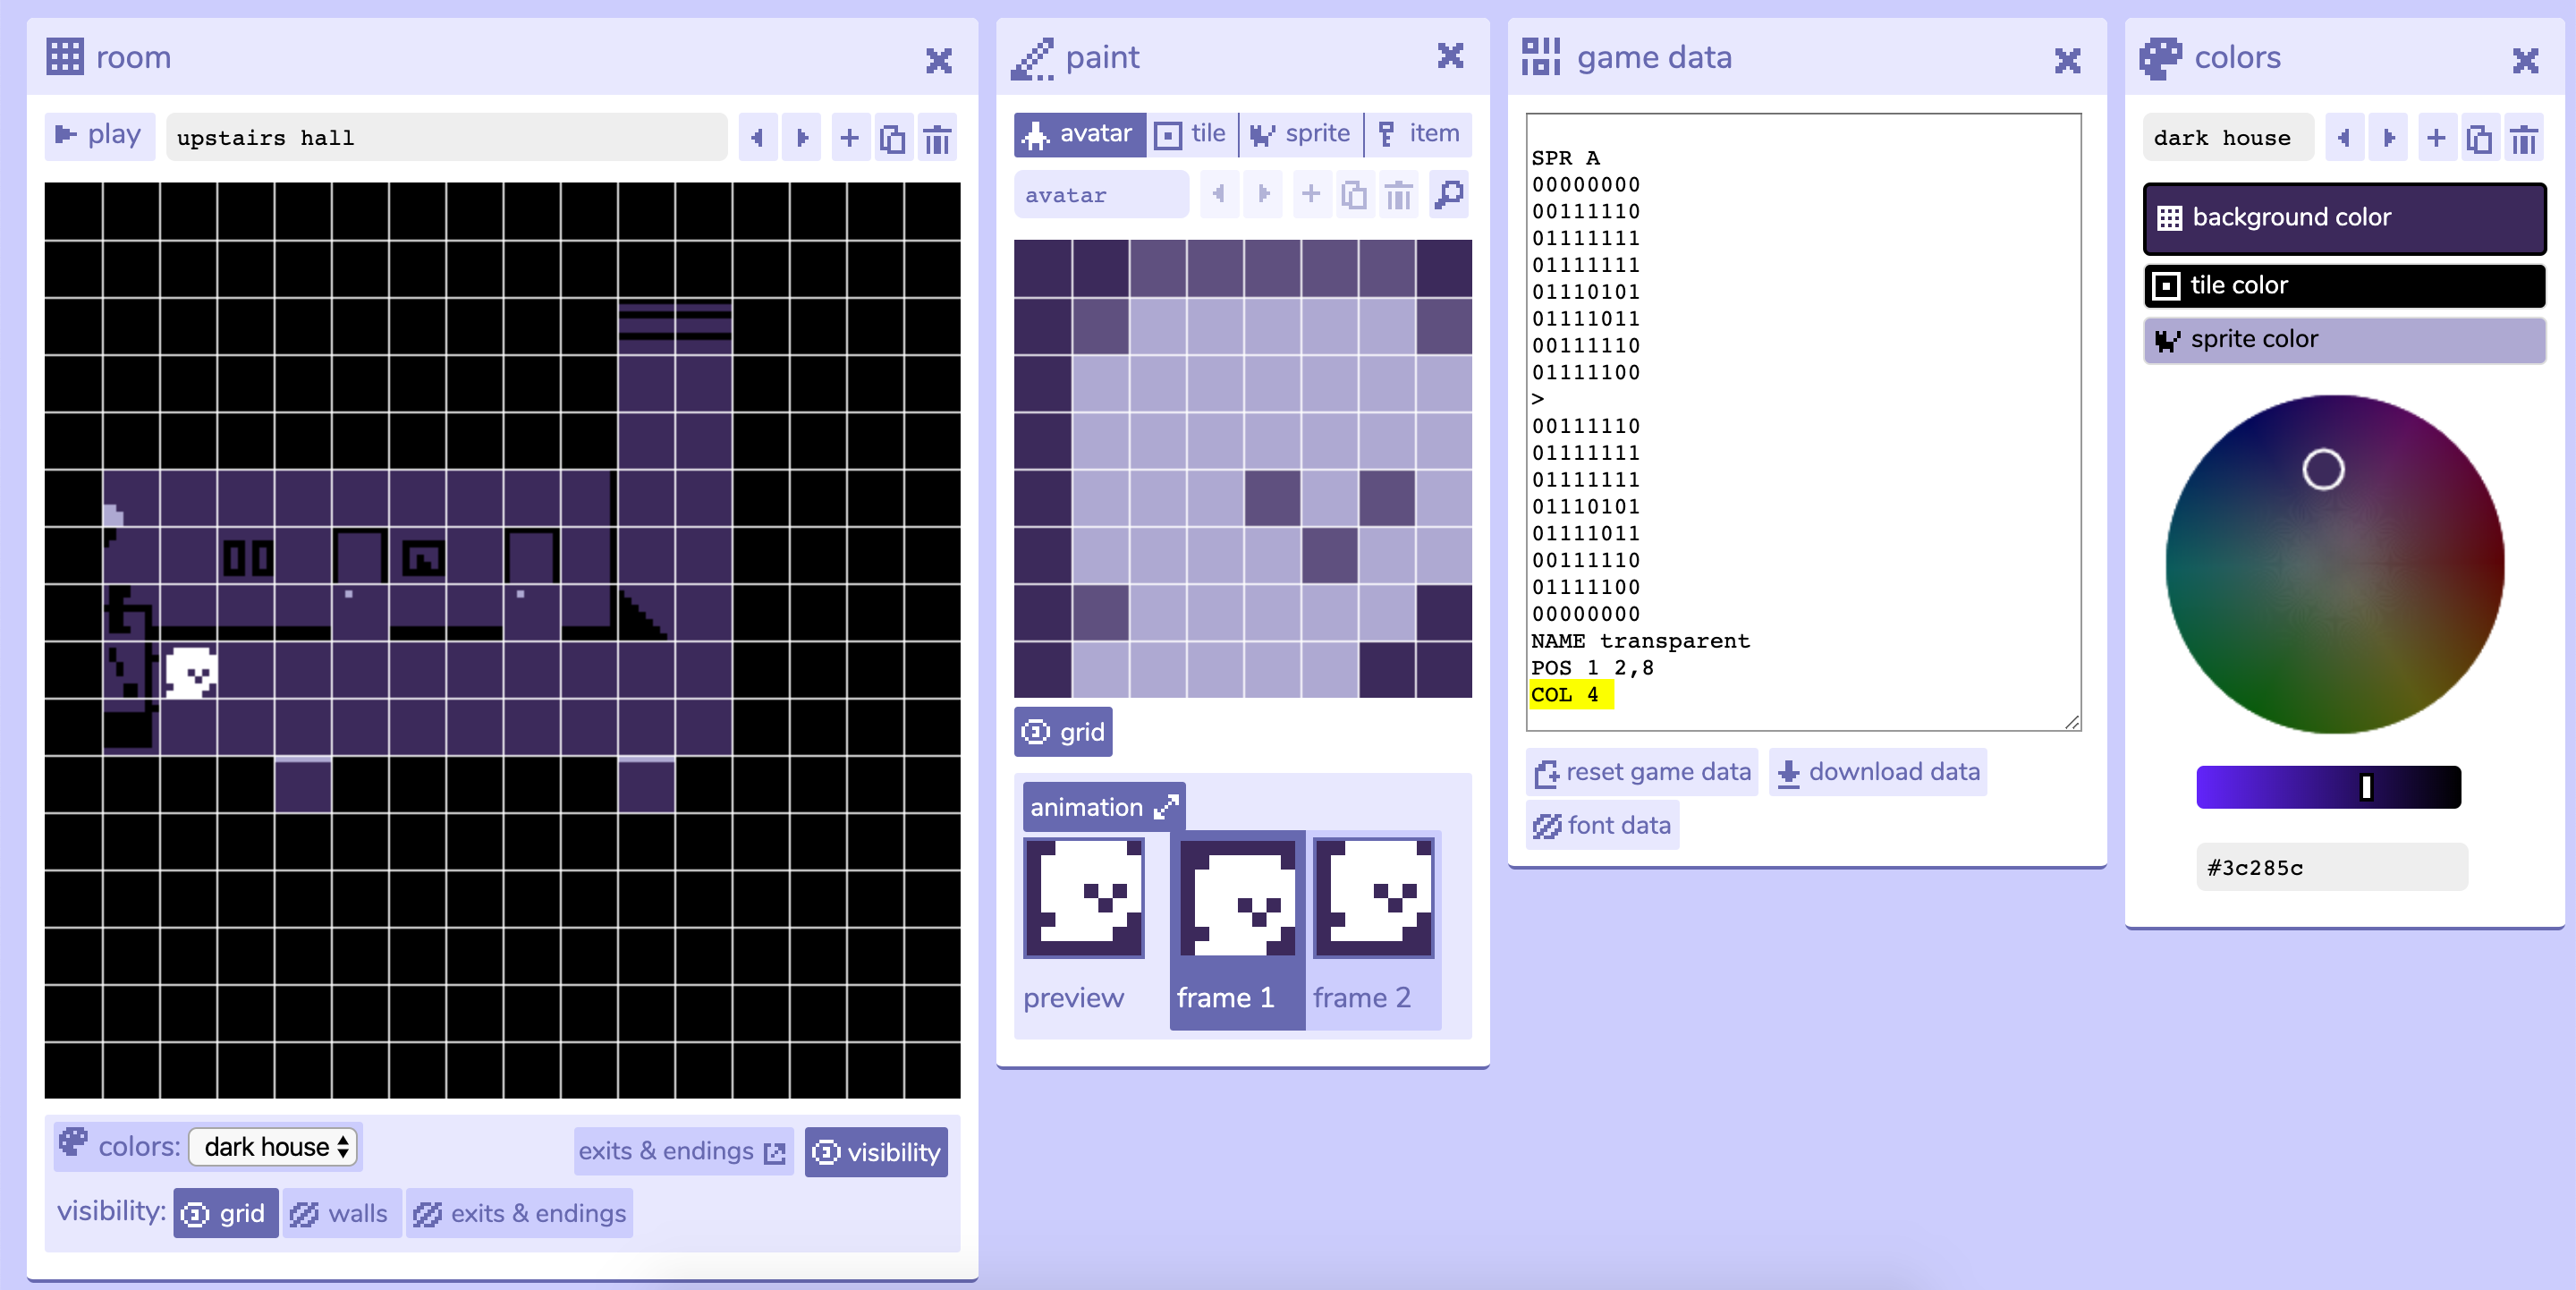
Then you can just change the color of any tile, sprite, item, or the avatar by just adding COL # at the end of it’s individual code.
Here’s an example of what everything will look like after doing that to the Avatar:
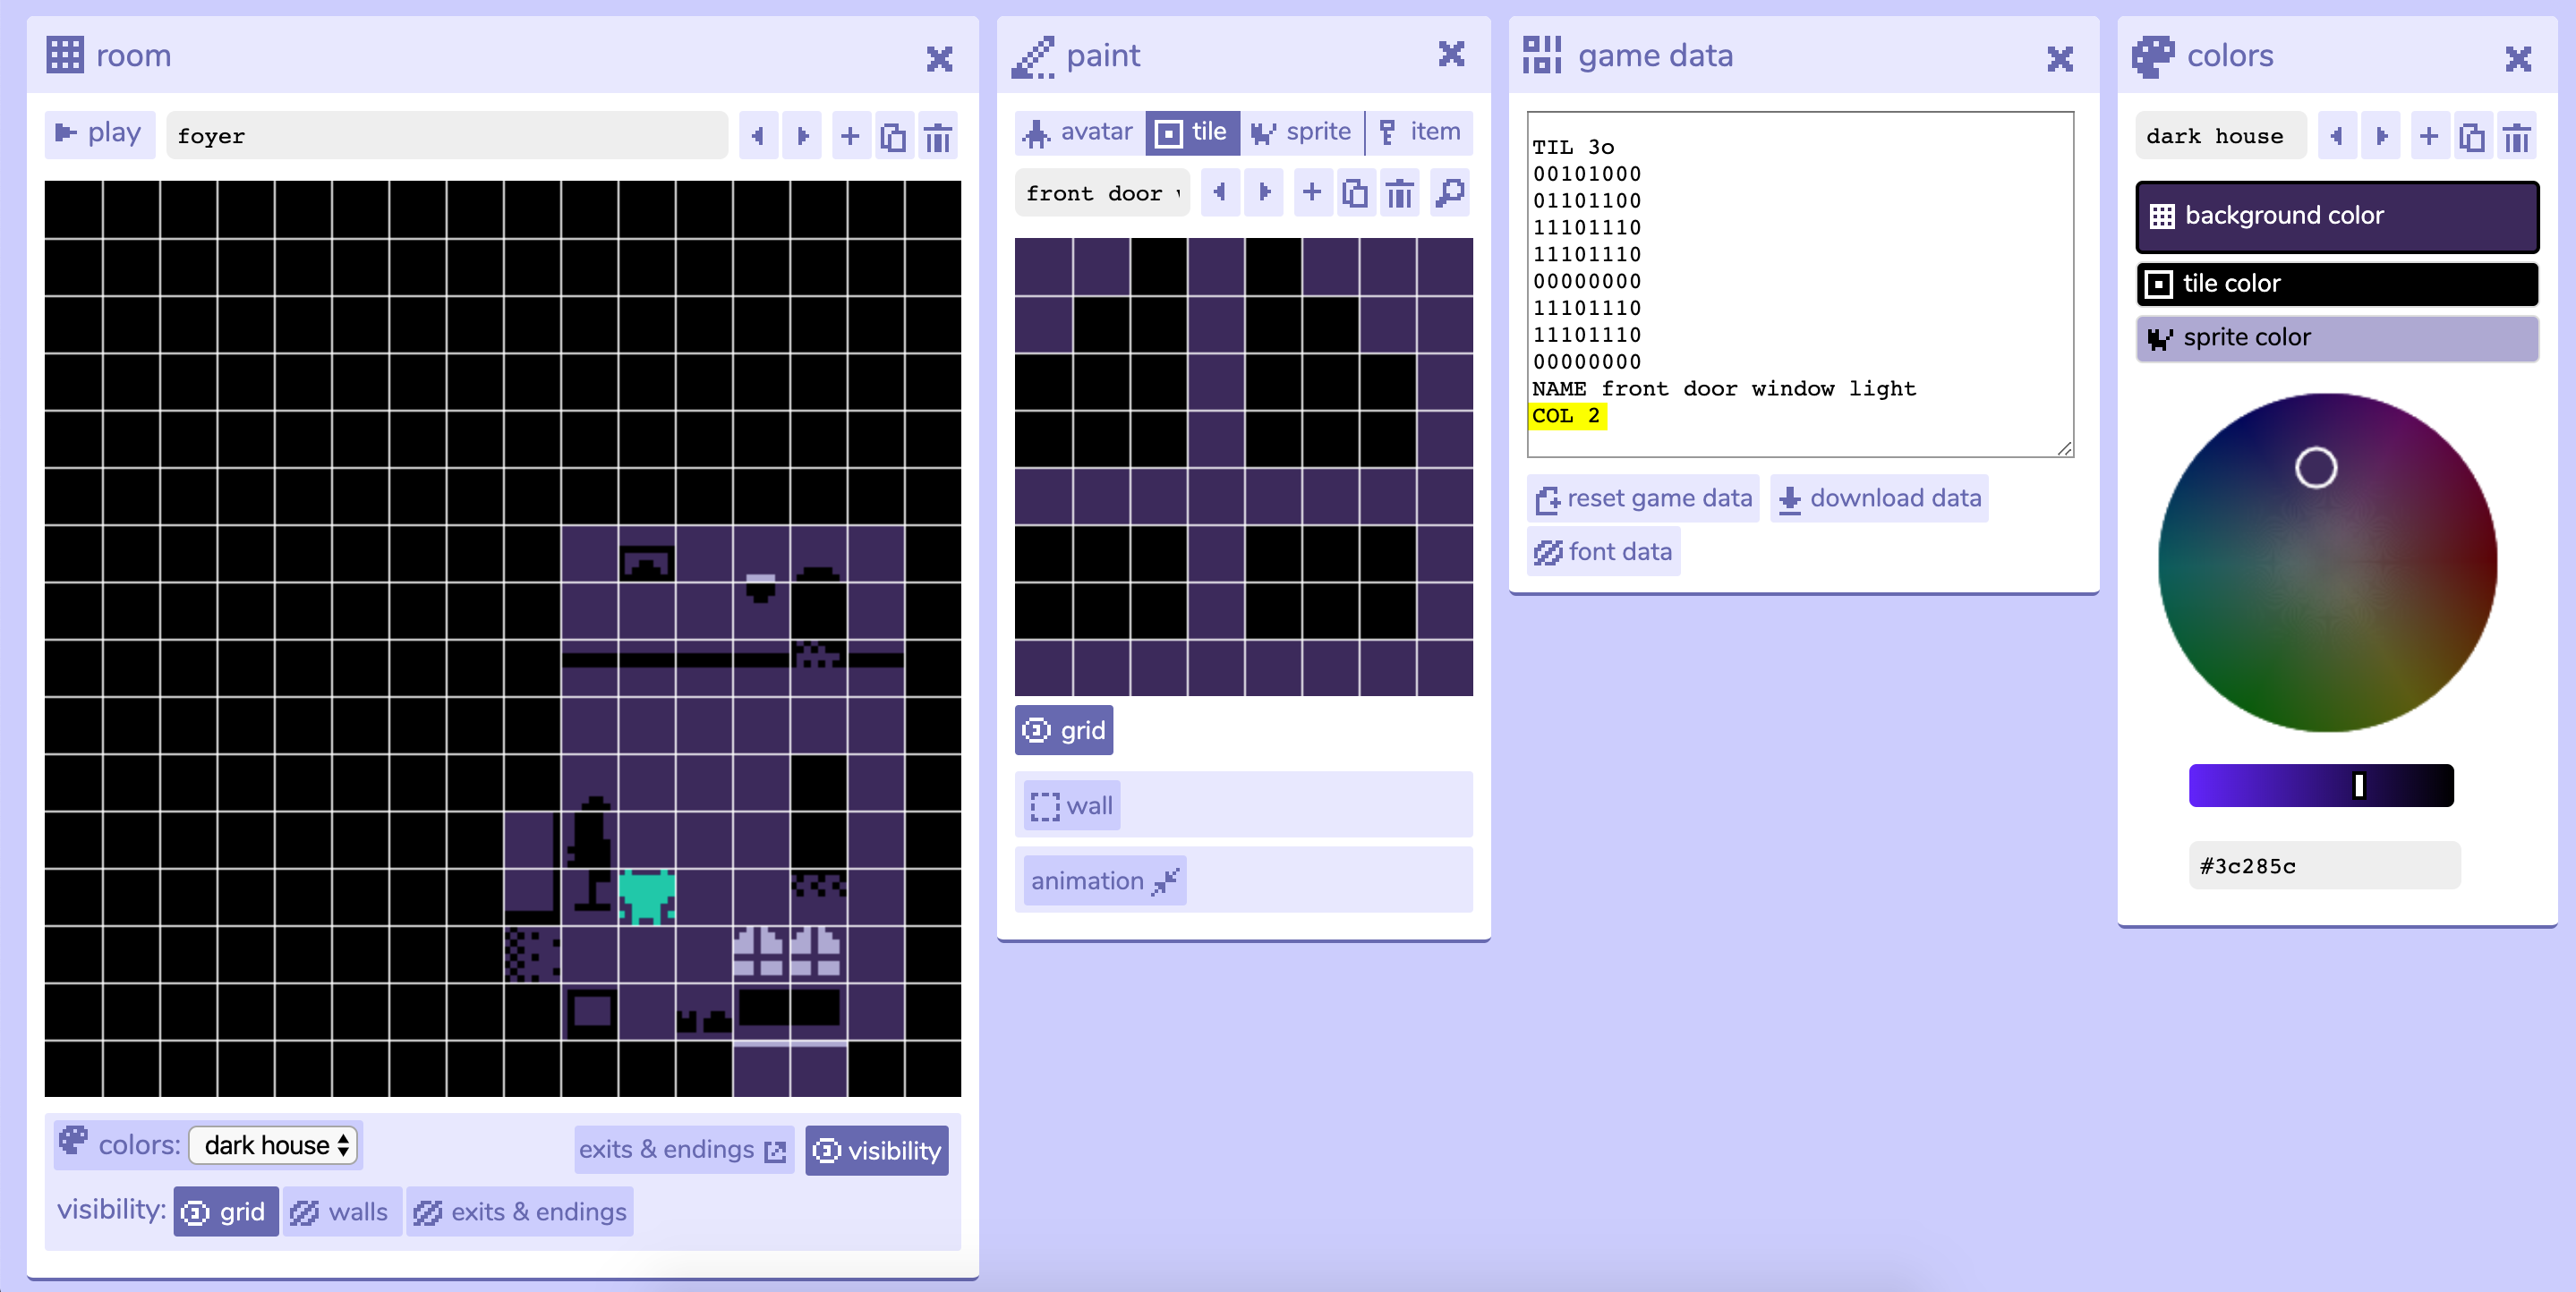
Here’s an example of what everything will look like after doing that to a Tile with a color that wasn’t added to the pallet manually:
I have a feeling I’m not quite done with this game. I didn’t play with accessibility options the way I was going to try to and I think it’s a great contender for experimentation. Very friendly and straightforward. Glowing reviews for Bitsy Savior. Excited to do more with this little ghost friend.
Leave a comment
Log in with itch.io to leave a comment.